Lost wax casting at Seawear studio
Some customers may enjoy this page, most will not. It is really designed for students trying to learn the art of lost wax casting. Some pitfalls to avoid, and some misteaks you just have to do, to learn. (yes, I know!)
If you are lucky enough to apprentice under someone or go to a jewelry school for a few weeks or months to learn, that is awesome! You'll save a lot of time and money in the long run.
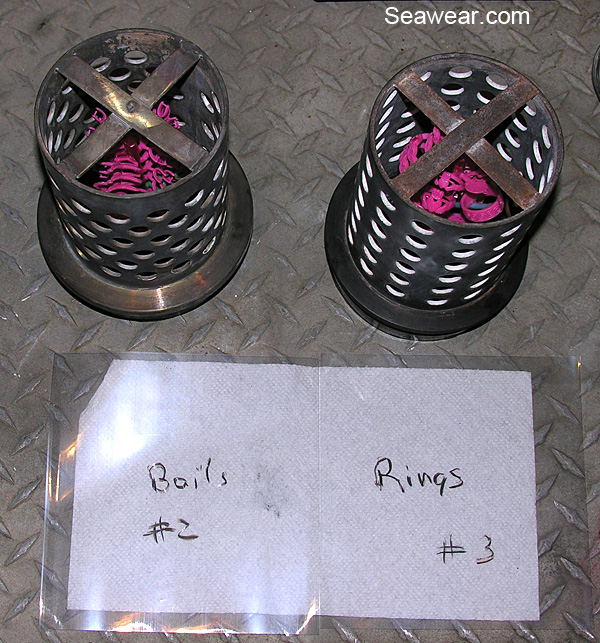
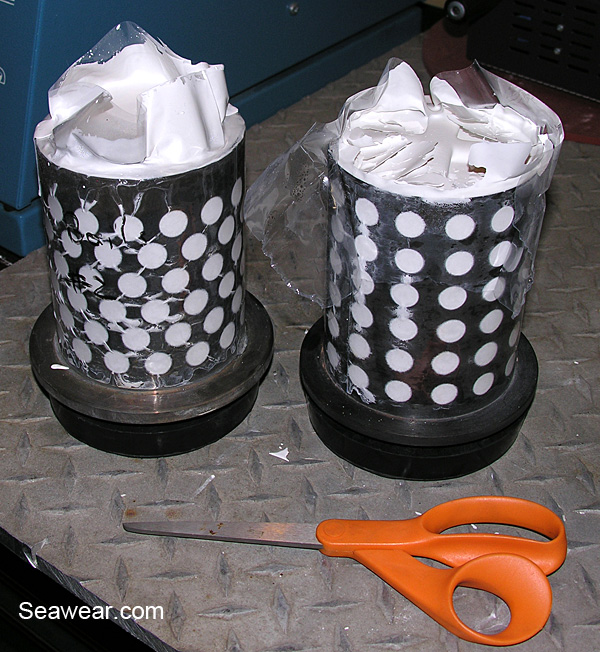
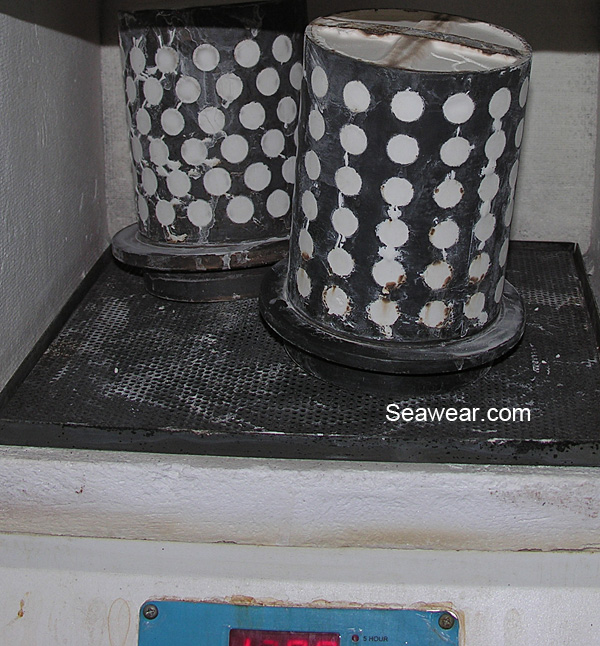
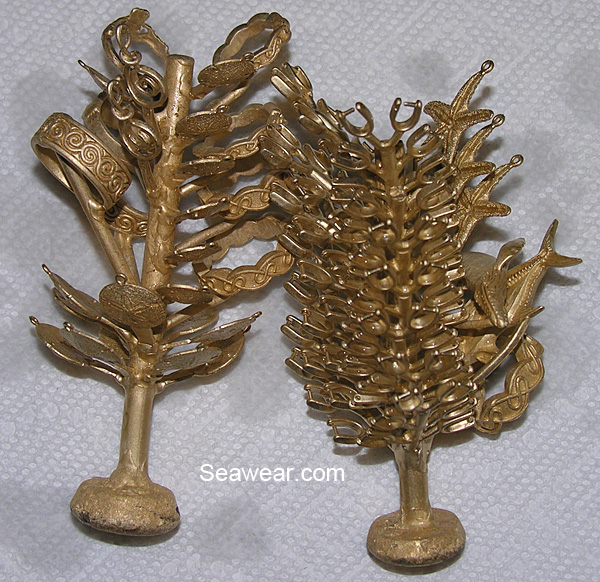
Here we have two 4x6 perforated flasks with wax trees preparing to be invested. I am using clear shrink bands from Rio Grande. These images were actually done for a product review for the Rio site. I've used newspaper and rubber bands, masking tape, the white and red rubber sleeves, and then someone gave me a case of these which I love. Liquid investment is going to be poured into the flask, something has to block all those holes and there needs to be a 2-3 inch riser on the top of the flasks for the investment expansion. Masking tape is quick and easy. Relatively costly. Price an 8" wide roll! It won't all come off so residue has to burn off in the oven. More fumes.
The newspaper and rubber bands is pretty much free. A little messy. But free. Free is good! The rubber sleeves are ok. I found I had to wet the inside to get them to slide over the flask. After they set up, I had difficulty getting them off. A few banged elbows and you'll be looking for something else. The red ones bleed red dye all over everything.
These ones are clear, I have placed them on a paper towel to make it easier to see. I simply take a grease pencil or China marker and write the flask number and contents. Once they are poured it can be frustrating to remember which is which when you go to mark them. Not so much if you are doing one at a time, but 3 or 4 at a time, it is easy to get mixed up.
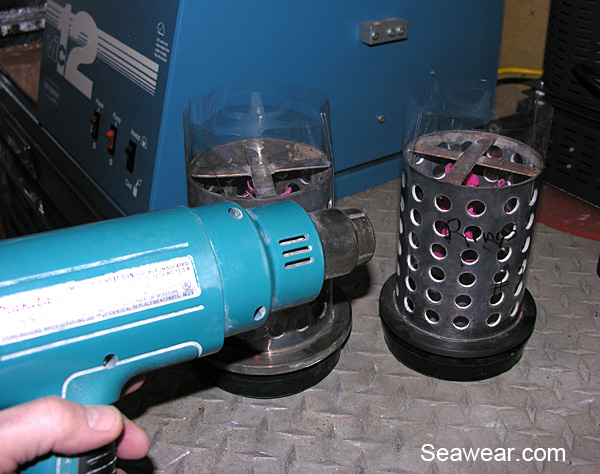
Simply slide them over the flask, gently heat with a heat gun and they instantly shrink making a tight seal. If you heat too much or too close, you will melt a hole in the wrap, simply place a piece of masking tape over the hole and you are good to go. Note the 2-3 inch rise above the top of the flask. This is to contain the investment when it rises and boils. The top will pull in sort of like a reverse funnel. You will appreciate this when you vacuum and de-bubble for a few minutes. Note the power light is on on the casting machine. The compressor has been run for two minutes before anything is done to distribute oil and flush the lines.
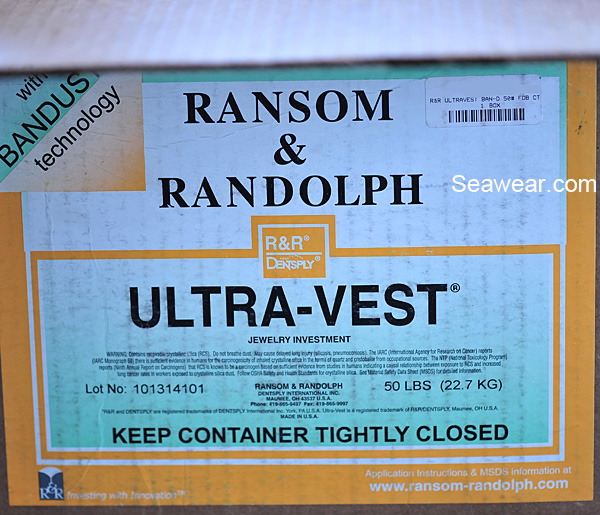
This is the investment I have been using with the band dust. Something is added to bind or band the dust so it does not become airborne. The week before Christmas I was low on investment so ordered two 50 pound boxes from two different vendors. (100 pounds is less costly but the shipping is more than double so actually ends up costing more.) The first rep I spoke with did not leave me with confidence. I stated two times I wanted the date code checked so as not to send me old investment. He seemed confused. The second one was ordered on line and comments noted. Sure enough, when the boxes arrived one was already five months old and the other was two months old. I've been using the oldest one up and will not order from them again.
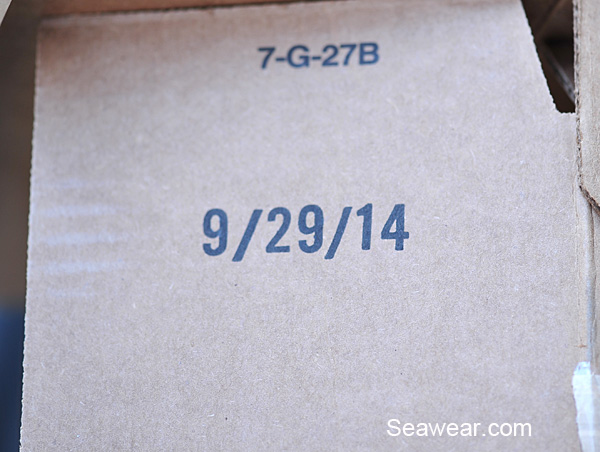
This is the date code on one of the inside box covers. This was the date it was packaged and shipped to the vendor. The manufacture states the shelf life is six months from this date. I know, some people use investment that is years old. When I started, the investment I had been given was years old. I had a lot of problems but thought it was something I was doing. If you are getting unexplained clumps, deposits, voids or funny colors, try a fresh batch of investment and document your results. I spoke at length with Kerr, R&R and S&R in England to get these problems solved. Your results may vary. It is like building a house, the foundation sets the tone for the end results.
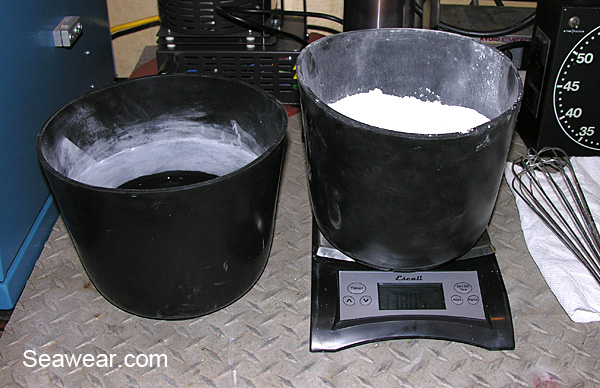
To the left is the water, the investment is on a scale ready to go. The rule is add investment to the water. I've tried both ways and see no difference. Even so, I add the investment to the water. You should wear a mask, and some may want to wear disposable gloves. The investment really pulls the moisture from your hands. If possible you should be doing this in a dedicated area with an air filtration unit. This is a special investment with bandust. Even sitting still like this the regular investment would have a little cloud of dust as it is so fine. That is silica and you do not want to breath it in. A good face filter at the very least. I give the dry investment a quick stir to be sure there are no lumps. Some people sift it. I've used the hand mixers which works great, but have burned out two. So I'm using a heavy duty French whisk from a restaurant supply house. The water and investment should be at room temperature, 65-70 degrees F. Colder will have a longer set up time and run the risk of separation or water lines, and warmer will set up really quick. This is in the winter and the investment is about 40F degrees so I let them stand for a while to equalize. The floor is cold and the bench top is about 60 degrees. In the summer it's reversed as it can be 80-90 degrees and things set up really quick. The bench top is 1/2" aluminum diamond plate with a 1/4" of high temperature silicone pad underneath. It cleans up easily, contains spilled metal or investment and protects all the tools in the cabinet underneath. I have a fume extractor going with an intake right above this area for any airborne particles. My five gallon plunge bucket is on the floor to the right, and to the left is one of three fire extinguishers.
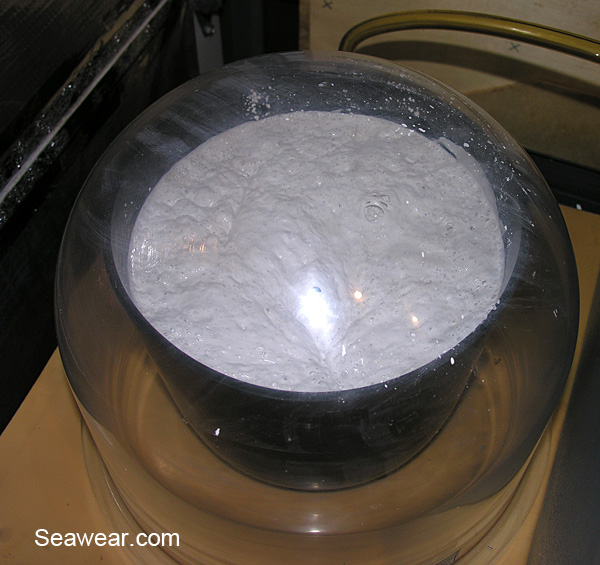
OK, we've mixed for four minutes and now vacuuming. This is the first vacuum to remove bubbles from the mixing process. The vacuum lowers the pressure and actually causes the slurry to boil. As the vacuum starts, you will see the investment start to rise, boil and then it will fall. At this point, shut off the vacuum pump and prepare to pour your flasks. Note the splatters on the dome or bell jar, this is normal as you had a good vacuum. There is no sense in boiling for a long time. It would boil all day or until the investment hardens. The next step is where we boil for a long time.
The flasks have been poured, just a little bit from the top and placed back under the bell jar. Here we can see the investment starting to rise again. You can fill to the very top, but the tree should be at least a half inch from the top. You can just cover the tops of the waxes slightly and leave a little room for expansion. Once the bubbles are all out, you can top it off again.

We now have a rapid boil and the investment has expanded and risen over two inches. Still has not overflowed! This is the long boil. I like to let it vacuum for another 1-2 minutes. What we are doing is removing bubbles that have adhered to the waxes. This does put a little stress on the waxes and you will see if your weld to the main sprue is good or not. If a wax does float to the top, remove it and cast as normal. If you do not remove it, it most likely will cause a bridge for the metal to flow all the way through when you pour without filling anything. The other thing I like about the clear shrink bands is it allows me to see if any waxes have broken off and are against the flask wall. Another cause of a failed cast.
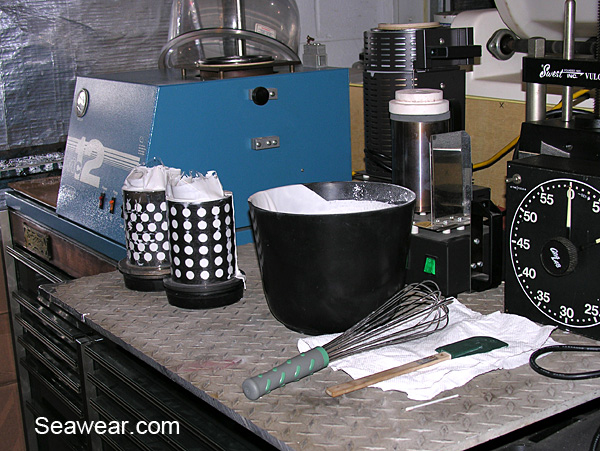
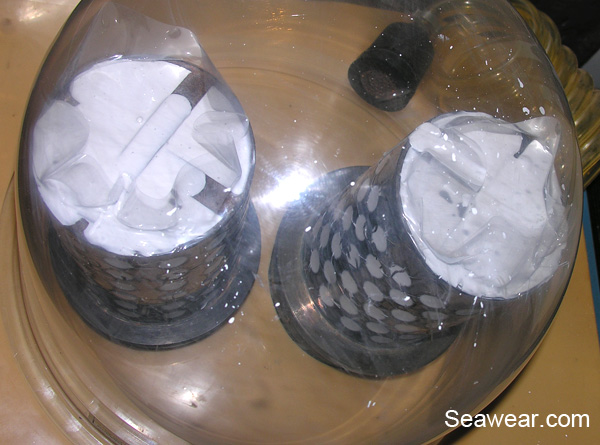
The flasks are finished, have been topped off and now need to sit for two hours without being touched, moved or disturbed in any way. This is the stage for curing. Two hours at least. The whisk and rubber spatula I have already swirled in the plunge bucket to clean. The bowl will just be flexed over the trash and most of the hardened investment will fall out. Note the large darkroom timer. This is easy to set for nine minutes with a loud buzzer. The mold vulcanizer in the background plugs in and shuts off in 55 minutes for mold curing. When I pour a flask, I will set to twenty minutes and know I can plunge anytime after the buzzer goes off. A great inexpensive tool.
Two hours are up! Simply remove whatever you have around the flask or the top of the flask if you are using solid walled flasks. Remove the rubber base, with any luck the first inch of wax sprue breaks off with it. Wipe the outside of the flask, smooth the top (which will become the bottom) and carve in the number of the flask with an old wax tool, awl or screwdriver. At this point the most important thing is the lip that will make the seal on the vacuum. I make sure it is clean, smooth and nothing to obstruct the vacuum. If a solid wall flask, then the top needs to be clean, smooth and a slight hollowed out spot in the center will help build up the pressure. I use an ice cream scoop to just scoop a little investment from the very center. Remember, the top in the picture becomes the bottom when you cast. If you are spin casting, the bottom is the bottom. You still want it clean and no loose investment or anything that will catch on the slung metal.
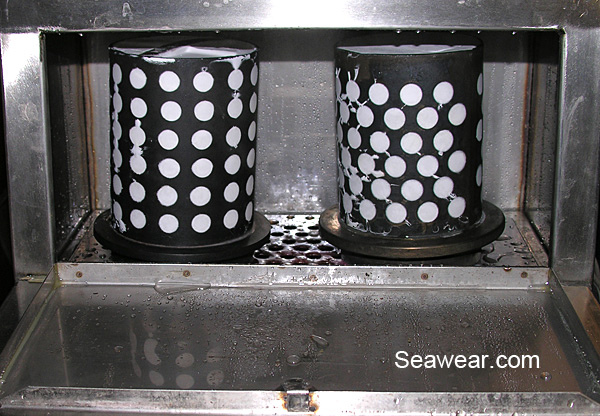
I steam de-wax for one hour. The steamer has been warmed already as you can see the condensation. Some may do this in a large crock pot. I did before I bought the steamer. Others will just put them in the oven to burn out. There is no right or wrong, just a preference. Another step, a little more cost, a little more clean up. I prefer to get the wax out prior to placing in the oven. If you have done a wax burn out, you know how bad the fumes are. The fumes and smoke are horrendous if you are in the same room during burnout. Four 4x6 flasks will be 100-125 grams of wax. That is a lot of smoke and fumes with a straight oven burn out.
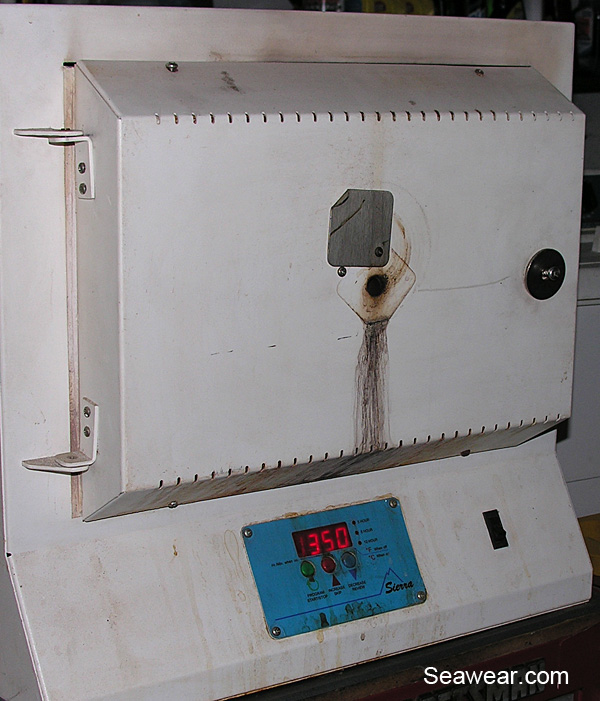
From the steamer to the oven. I have the oven warming and try to catch it at about 200 degrees to place the flasks in. If they were not coming from the steamer, I would place them in the cold oven and let the flasks come to temperature with the oven. This is the first stage or ramp as it's called. 350F degrees for an hour. This melts the wax and removes the moisture from the flasks. The vent on the door should be open all the way. The vent on the top should be open all the way. The oven needs fresh oxygen constantly during burn out to have a clean cast. If your metal ends up with black or sulfur around the edges, it lacked oxygen. My fume extractor intake is above the stove vent.
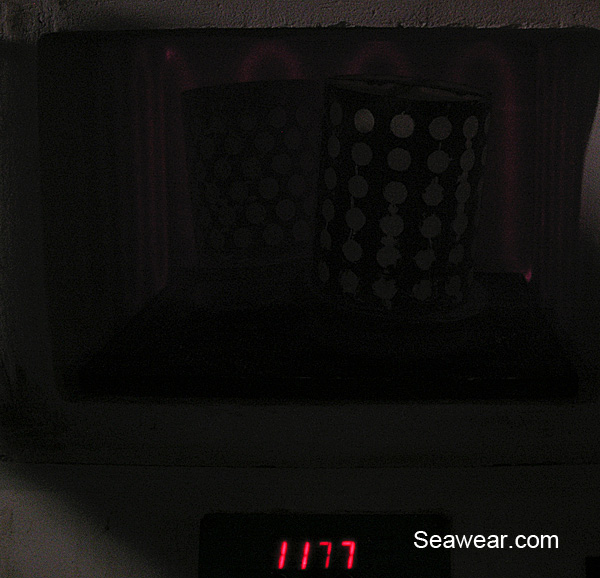
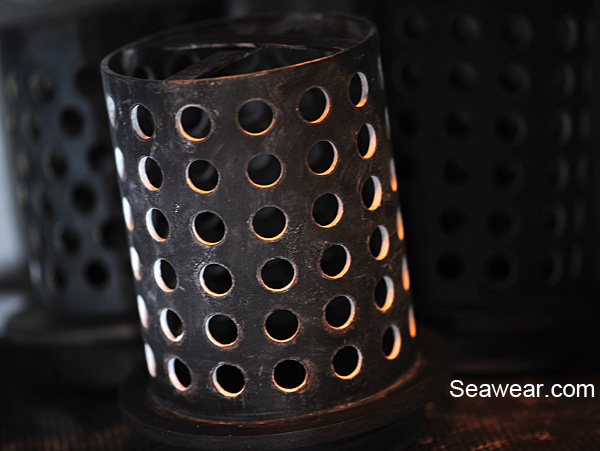
You can vaguely see the red glove of the heating elements and flasks. They will get a cherry red at 1,350F degrees which is the max ramp for standard investment. The investment will start to break down above 1350 so then you must be using white gold or platinum investment for the higher ramps.
This is 1350 degrees F and with the flash, it does not look like anything. You can see around the holes where there are burn marks indicating the high heat. This is a 12 hour burn cycle, then an hour to hold at the casting temperature. I allow 13-14 hours in my planning of when I will cast.
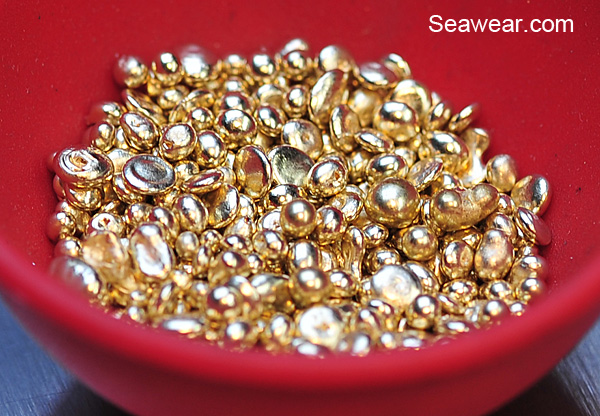
The gold casting grain has been pre-weighed and staged for each flask. 99.9% of all casting grains are 'green' meaning recycled and not freshly mined.
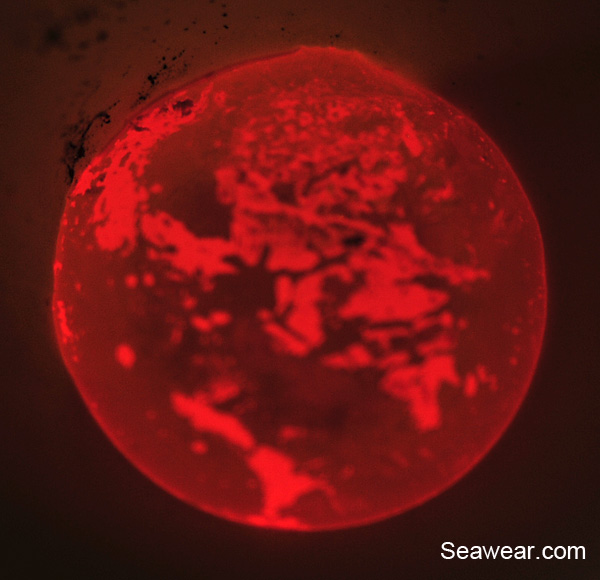
For a few seconds after the liquid metal is poured, it dances! You can actually see it moving around. It will last 2-15 seconds depending on which metal and how hot it was. It will be red, even if it is silver or white gold.
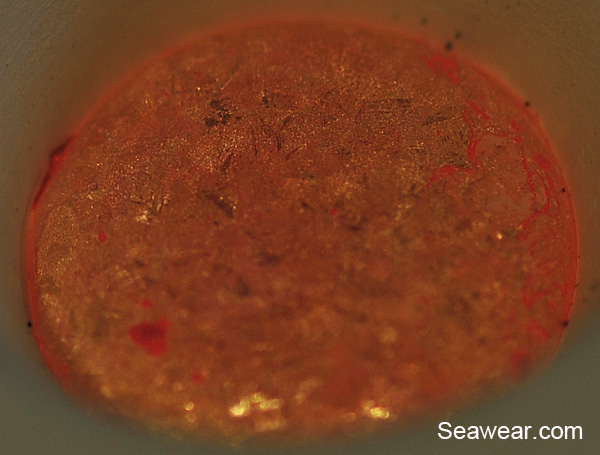
14kt yellow gold has just been poured from an electromelt furnace. This is the button. It sets up very quickly. I had the camera all ready and maybe took ten seconds to pour and grab the camera. You can see the edges are already beginning to harden. Notice the lip of the flask, the bottom from the previous images has now become the top. I am using a high temperature graphite gasket rather than the rubber ones. The flasks need to be a little hotter with vacuum casting, I tend to pour hot so the rubber ones burn out too quickly. I almost always use a 4x6 flask as the weight gives me a great seal. This is being done in January, outside temperatures are in the teens, the shop is cold so metal sets up fast. With the vacuum on, the flask will drop about 100 degrees per minute. I think more in the winter as it is that much colder. A quick vacuum and good seal are a must. The flask is 1025 degrees but by the time I pour is down to maybe 950. The rubber gasket would be fine at 900-925 but burns up with the 1000+ degrees right out of the oven.

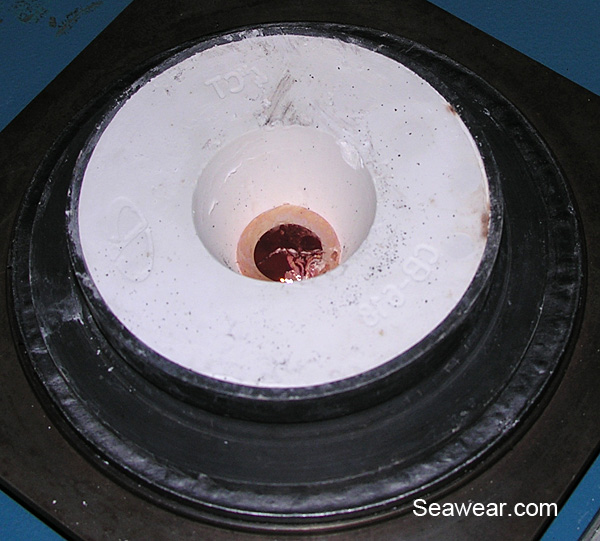
The very dark center is still liquid. You can see a few veins of solidification beginning to form.
Everything has flashed over, the very center had not cooled as much as the edges. you can see the crystals actually taking shape as the metal settles and cools. The black spots are the graphite specs from the crucible. The dark red on the lower left hand side are just impurities pulled off from the borax. Even with brand new casting grain there will be some impure residue that is like glass. It is the last thing poured and separates from the metal. Contaminants are in the air unless you are melting under a vacuum and pumping in argon.
Some people plunge the hot flasks to break out the investment. You should wait 15-20 minutes unless it is rose gold. To me, it still shocks the metal so I tend to wait longer and let all the grain structures pack themselves in tightly. It's more work cleaning up, but I really believe the metal is stronger, just as if it had been annealed and allowed to cool on it's own. I end up boiling the cast trees in an ultrasonic cleaner with special investment break down. It takes about two hours. I want them really clean before I start working on them.
As soon as the flasks are broken out, I like to scrub them clean and place them back in the oven. The oven is off and cooling down on it's own and will dry the flasks quickly.
These are clean, dried and allowed to air dry for an hour or two before I will let them near the tools. Moisture on your good tools is a bad thing! The white backgrounds in the images are paper towels. I go through a lot of paper towels! The accountant does not understand.
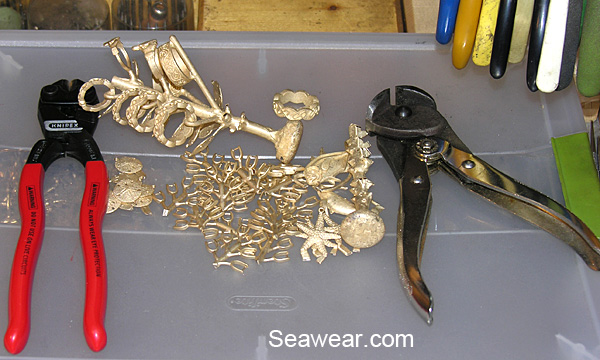
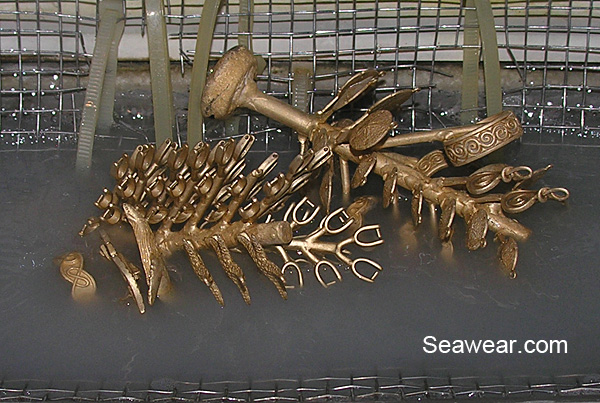
Cutting off the pieces from the trees. This is a 1/4" main sprue. The difference between using a 1/4" or 3/8" is about 100 gms on a 4x6 flask. That is more than three ounces of metal so it really adds up. I have experimented with a lot of cutters, these are my favorites. On the left is a Knipex bolt cutter and the right is a very old blunt end cutter. The pile in the very center is about 200 bails. Each bail is cast for each pendant. There is a hole on one side for the pin to go through, then cut flush, soldered or welded and polished.
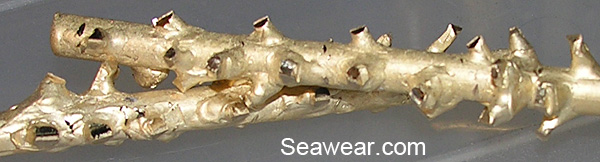
A close up of the clipped ends. Nice dense casting, good color, no voids or defects inside. If I saw any kind of problem here, it would be best to scrap the entire casting and pieces. If you see bubbles, voids, porosity or anything other than a solid smooth mass, stop and figure out what went wrong. If there are problems inside, it will be amplified on the outside. It could cause brittleness, discoloration, weakness or just a possibility to fail later. Better to start fresh then risk having a problem with a piece in a customer's hands later.
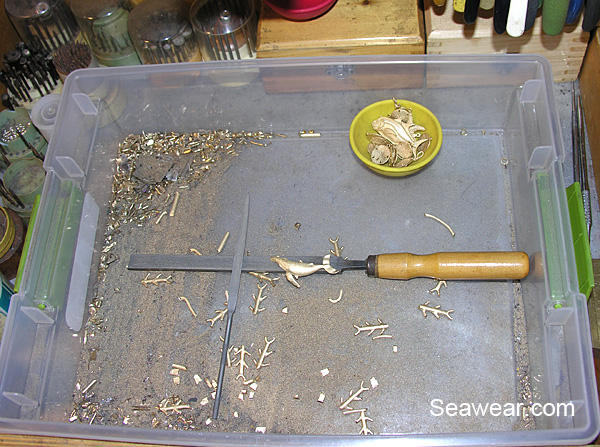
Here all the pieces are hand filed to bring the feed sprue into blending with the texture of the piece. A separate container for each metal and color is easy to swap out from the drawer tray and will result in a higher yield for you when you send it out to be refined. If you are lucky, a 400 gram cast will yield 125-150 grams of finished product. No wonder it costs so much!
From here I go into a detailed five day tumbling process that can be found here. I did this page about a year ago for some people on Ganoskin. Burnish finishing.
If you are hand finishing, there is a separate buff for each color of metal and each color of compound. I have at least ten buffs for yellow gold, and 5-8 each for white gold and 5-8 for silver. That is a lot of buffs to keep separated from each other.

These are two rings that have just received the final final polish. Once all the dirt is gone they will be bright.
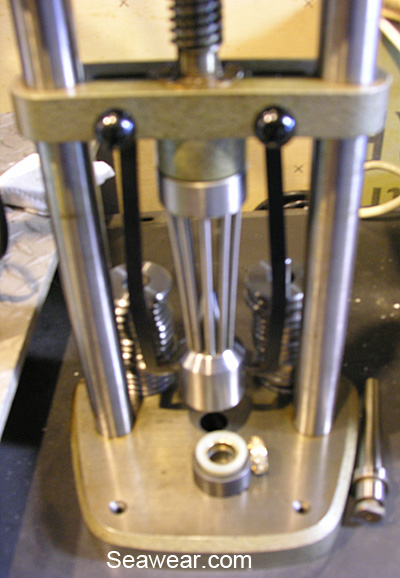
All rings made at Seawear studio are accurately checked for size. Both sides of the ring will touch the correct size on a calibrated sizing stick. For those that size 'on center' the ring will actually be 1/4 size or more larger on the ends. This is an original Niessing machine from Germany that is maybe 50-60 years old. They invented this in the 1920s so that wedding bands could be stretched or compressed without marring the details. A store was only required to stock a few sizes of rings and then could alter those rings in minutes. The Niessing family was very surprised to learn one of these made it to the United States. From what I have found there are a handful of the originals here. Another company has been making them now and they are blue. If you look close you can see a rim of gold within the white sleeve. The sleeve is delron or lexan or some other durable plastic. The stress of compressing or stretching is transferred from the metal to the plastic which transfers it to the gold without marring the finish or design. The two rings in the previous image were to be 9 and 10, the 9 was 9.25 and the 10 was 9.75 so each had to be accurately adjusted to within 1mm tolerance.